Installing a Stebel air horn on a motorcycle
The wimpy "meep-meep" stock horn on my 2001 Triumph Bonneville, like most motorcycle horns, is pretty much useless at getting the attention of a distracted driver in a car headed right at you. I finally ordered the acclaimed and very affordable Stebel Nautilus air horn (also marketed under the apt name "Ear Cannon" - mine was less than $50 from Aerostich) but when it arrived I realized that this compact device, made for automobiles, was still too big to simply replace my existing horn. No, I had to do what every red-blooded biker does - customize. One valuable piece of information was available on the Web - the idea that the device could be broken down and mounted in parts. In the spirit of giving back to the community, here's what I learned.
Ride safely.
Lincoln Cushing
Berkeley, California
5/28/2013


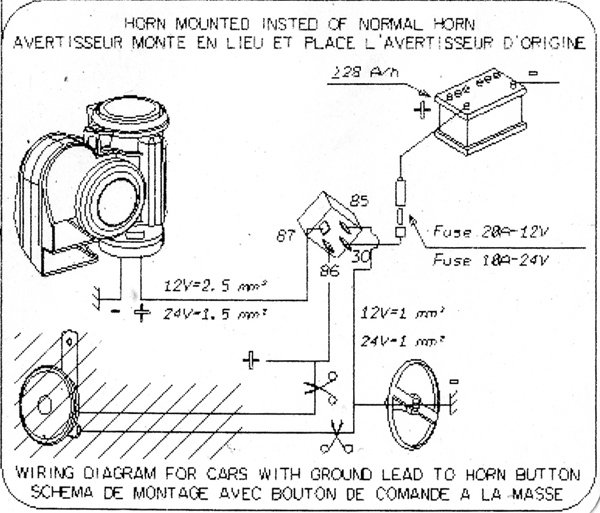
Let's hook them up.
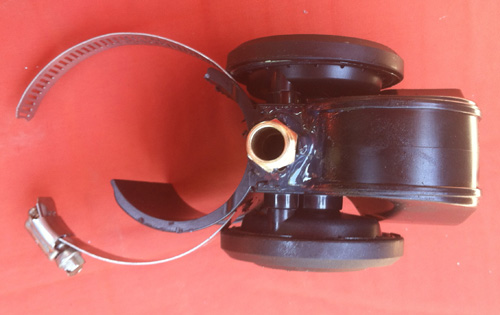
Horn installed, hose clamp on top of short section of standard PVC pipe foam insulation. The foam accomodates for the curvature of the horn's plastic mount, which is a larger diameter than my frame.

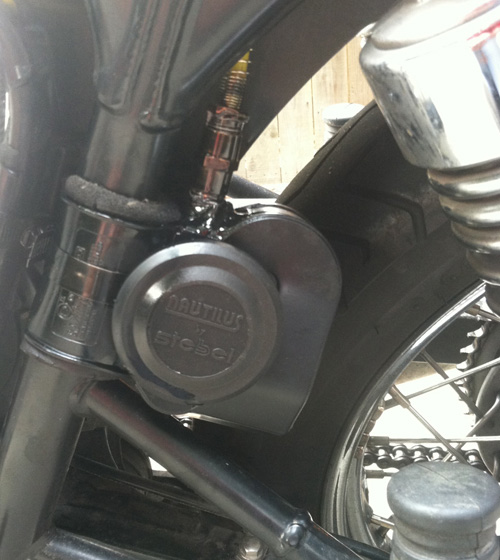
Front fork view.
I disconnected the leads to the existing horn. I left everything intact if I decide I want both horns. The lead I wanted was the purple one. I added a wire running back along the chassis.
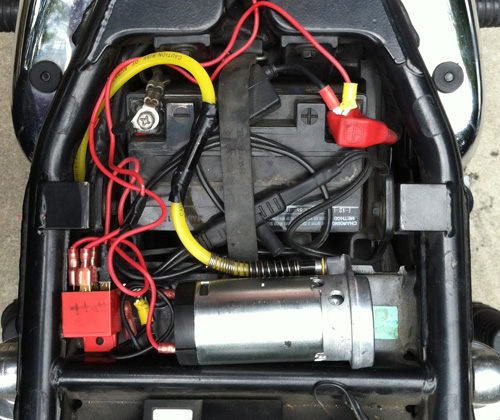
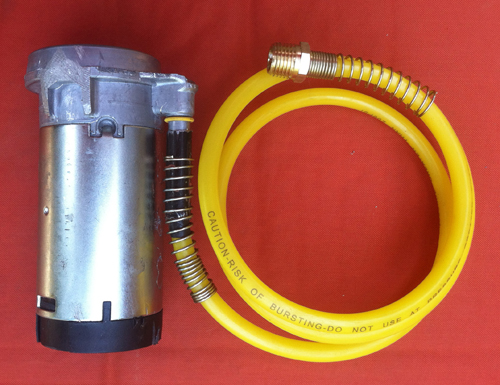
Here it is, ready to go. Don't laugh at my wiring. If you are fussy Aerostich sells a wiring kit. I added a connector between the pump and the horn - I may want to add a fitting there to let me add air to my tires when far from a gas station. My stock seat fits on top of this, but was tight, so I tweaked the plastic panel under part of the seat to better accommodate the pump.
It is LOUD.
I promise to only use this power for good. Yeah...